The field microclimate automatic observer is a multi-functional measuring instrument for measuring field environmental parameters. The instrument has a variety of models and can measure up to 11 parameters such as temperature, humidity, light intensity, wind speed, direction, and rainfall. , Dew point, soil EC conductance and other parameters, also referred to as small weather stations or small weather stations.
Below we mainly analyze the operating procedures of the field microclimate automatic observer and hope to benefit everyone.
one. Small weather station front panel and operation instructions
The front panel of the small weather station consists of the LCD display window and function buttons. The power switch is pressed to turn on the working power, and then pressed to turn off the power; the other parts are described as follows:
â— Display window:
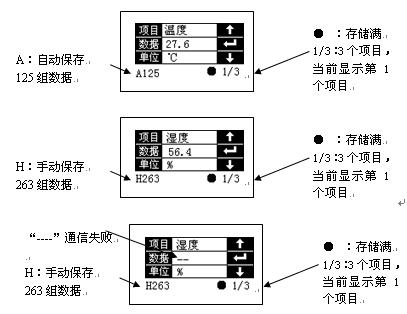
1, a page shows a project parameters;
2, through the up and down keys to switch display items;
3, H or A, H is to manually store data A is automatically saved data;
â— Function keys:
Small weather station operation instructions:
1. Power on: After power on, enter the test interface, press and hold the "Power" button for 3 seconds to shut down or reboot;
2. Display item switching: Press up and down keys to switch display items;
3, view the record: In the project detection interface, press the confirmation key to enter the viewing record data interface, and then press the confirmation key to return to the detection interface as shown below;

4. Test: At this time, the interface displays the test interface before the last power-off, and performs an automatic test (for the case of no change from the machine before power-off), and the test is performed according to the mode before the power-off. If you increase or decrease the number of slaves, the host must restart the slaves to ensure that the slaves are recognized by the master. Restart method: Press and hold the “Auto/Manual†key for more than 3 seconds. The host will enter the restart state, rescan the slave, and clear all stored data.
5, manual and automatic switch: power on manually save the data by default, the bottom right corner of the screen shows H, need to press the save key to save the test parameters, if you need to switch the storage state should press the auto/manual button, automatic state display A, the system according to the preset The time storage parameters; each store a set of data, the screen shows the data in the lower left corner plus one.
Press and hold the AUTO button for 3 seconds to search for item sensors.
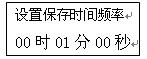
6. Set the sampling interval in the automatic state: Press the setting key and the screen will appear (figure). Press the setting key again to set the hour, minute and second. Press the ∧ and ∨ keys to set the sampling time and the setting is completed. Press OK to return.
7. Sending data: Connect the instrument's own data cable with the computer, press the send key to send the stored data to the computer, and convert the data into a graph curve, EXCEL form, or notebook document through the computer software. (Please refer to the software communication for details. Description).
8, in the case of full data storage, the screen appears "â—" pattern, press the delete key to delete all the data.
1, sliding bearing
2, joint bearing
3, rolling bearing
4, deep groove ball bearings
5, self-aligning ball bearings
6, thrust ball bearings
7, two-way thrust angular contact ball bearings
8, thrust roller bearings
9, needle bearing
10, outer spherical Ball Bearing
11, spherical roller bearings
12, flange bearing
13, with bearing
14, combined bearing
15, linear bearings
Other Ball Bearing
Ball Bearing,Deep Groove Ball Bearing,Miniature Ball Bearings,UCP Units Bearings
Hebei Naimei Bearing Co., Ltd. , http://www.nmn-bearing.com